Creating copywork pages with iPad Pages
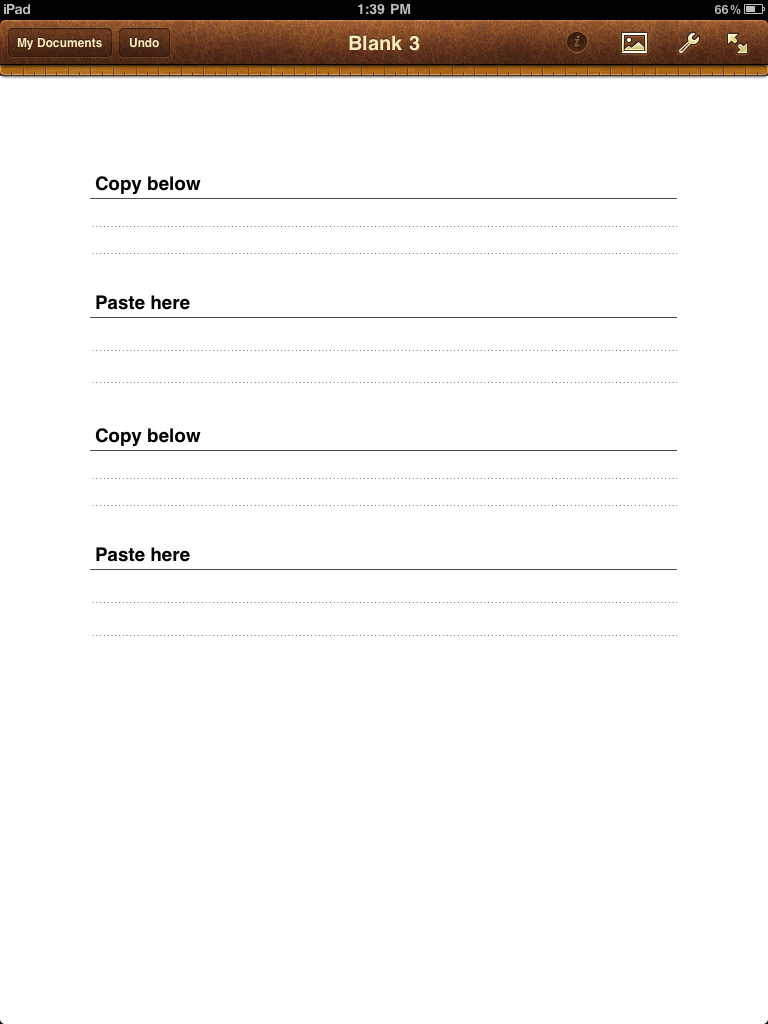
Copy work page created in Pages on the iPad
Yes it is possible to do work on the iPad. Of course there are limitations but for what I need it seems to be doing well. Copy work pages are a great use of the iPad. For one thing I don’t need to type a lot of text. Most of the text I copied and pasted into the document. I was initially woried that I would not be able to make guidelines for copying. I knew Pages on the iPad could make a table but I couldnt tell from the documentation just how much you could change the tables. I was pleasantly surprised at how much I could customize. It is a little hard to find so I thought I would outline what steps I took.
Step one: Insert table
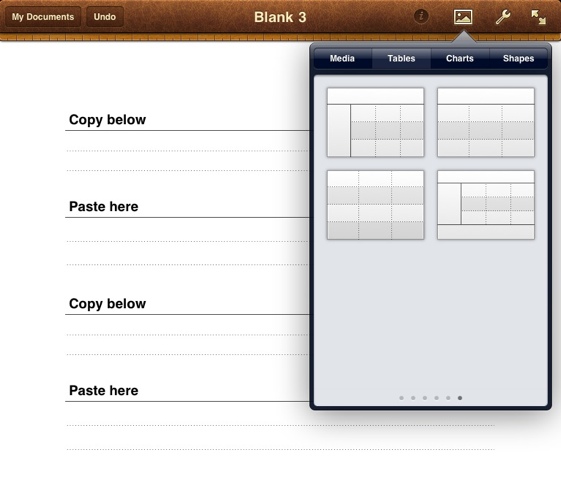
First you select a table format that looks similar to what you are trying to accomplish. I selected the table that had a dotted line in the middle and a grey cell.
I picked the table that had a solid top line and the other lines were dotted.
Step two: Change number of columns and rows
To change the number of columns and rows first select the table and then touch the arrows on the bottom left and top right corners. Change the number of columns to one and the number of rows to four.
Step three: Modify table
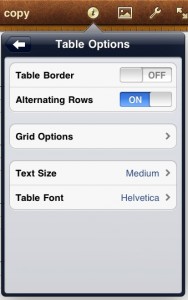
With the table selected touch the “i” on the top menu bar. There are three different tabs at the top that you can choose to edit: Table, Headers, and Arrange. (If you have a cell selected instead of the table then the last tab is “Cells”) At the bottom of the defalt “Table” tab is “Table Options”. Select this for more options.
Select “Alternating Rows” to OFF. This will remove the grey shading from the second row. You could alternately change the color by selecting the individual table cell background color.
You can also change the text size and grid. If you select the correct table then you do not need to do anything with the “Grid Options”. I was hoping to change the dash style of the middle line but that is not possible using Grid Options.
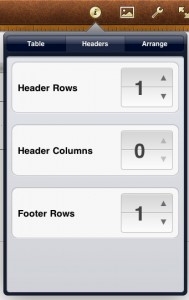
Select the table again and this time touch the “Headers” tab. Change “Footer Rows” to 1 and this will show a dark line at the bottom of the table.
Step four: Finish the table
The table is basically finished. You can copy and paste this table several times in the document. Just select the table and select the upper left hand corner circle and there will be an option to copy the table.
Once you are happy with your table you can type or past words in the header row
Note: If you are adding additional text you may want to change the arrangement. If you select the table and touch the “i” to pull up the table options. Then select the “Arrange” tab and select “Wrap”. If you select “Move with Text” to Off more options will be available. I like to select the wrap to “Above and Below”. I also like to add a little extra Space around the table.
The Pages iPad table is now complete and ready to print out.
